Good and bad examples
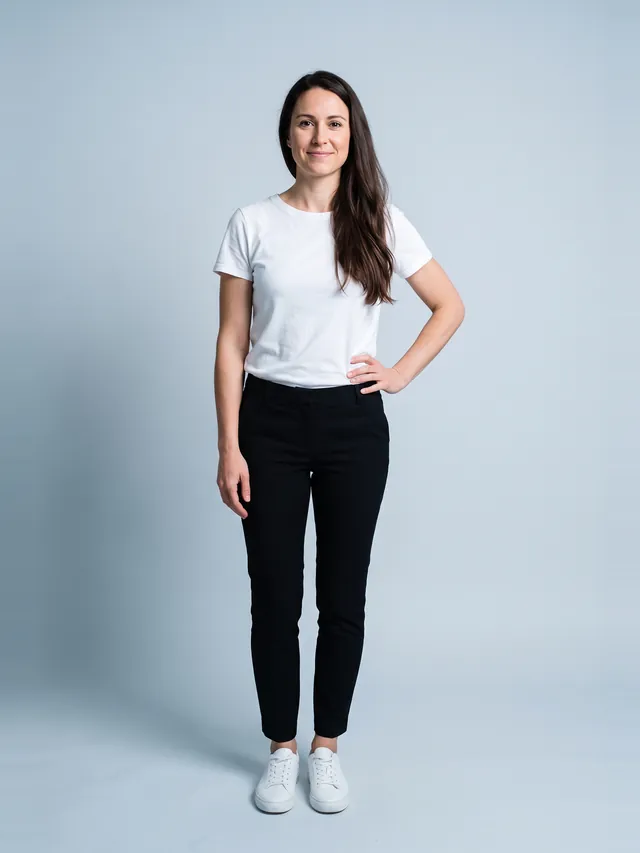
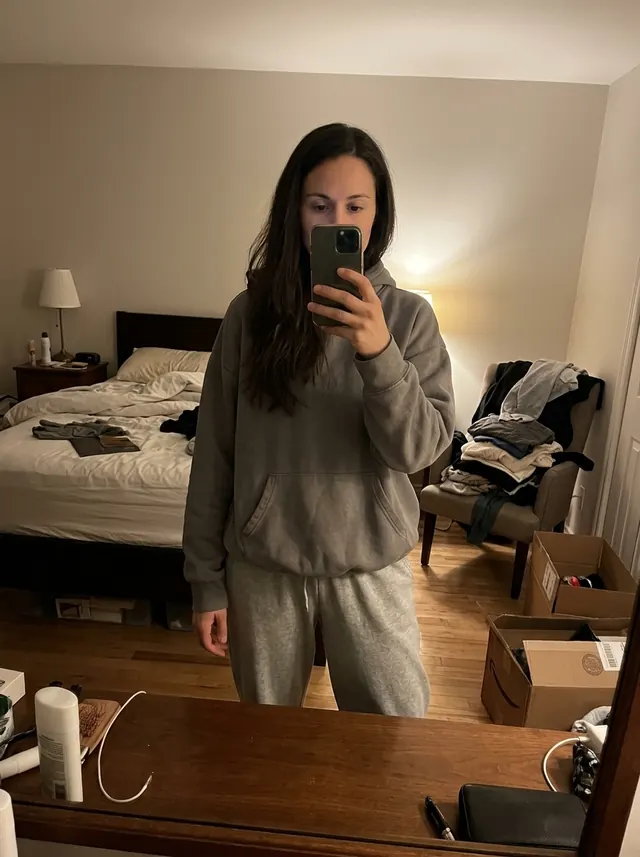
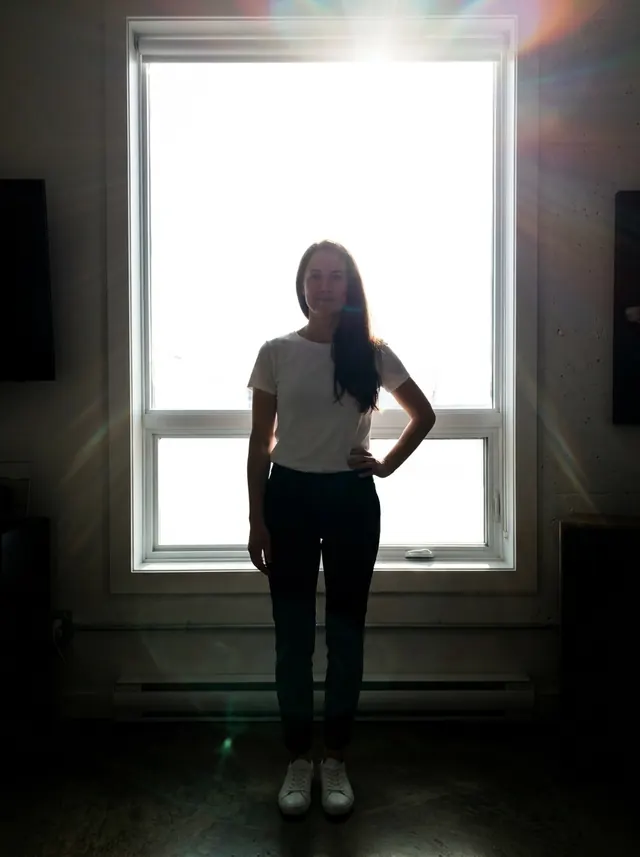
All four pictures show the same person. Only the first one gives an overlay or a try-on a fair chance.

Framing
- Show the whole garment area. Waist-up is fine for tops and jackets. For dresses, coats, skirts and trousers, take the photo full length, from the top of your head to your shoes, with a little space above and below.
- Hold the phone upright. A portrait-orientation photo uses the frame for your body instead of the walls on either side.
- Keep the camera level with your middle. Chest height for waist-up shots, roughly waist height for full length. A camera above your head makes legs look shorter; one at knee height does the opposite.
Pose
- Face the camera square on. Product photos are shot straight on, so a straight-on photo of you lines up with them. A slight turn is fine for AI try-on; for a flat overlay, square is much better.
- Arms a little away from your body. A small gap between arms and waist shows your outline and keeps sleeves from merging with the torso. Crossed arms hide most of what you are trying to see.
- Stand evenly. Weight on both feet keeps your shoulders level, which makes a garment overlay register more easily.
- Hair behind the shoulders if you want to judge necklines and collars. Leave it as you usually wear it if you want to see the whole look.
What to wear for the photo
Wear something thin, fitted and plain: a t-shirt or vest top with leggings, slim trousers or shorts. Light grey or white works best for overlays, because Multiply blending stays close to the garment's real color over a light base.
Avoid baggy layers. An oversized hoodie hides the shape of your shoulders and waist, so an AI try-on has to guess at your body, and an overlay can't cover the bulk poking out at the sides. Avoid busy prints and logos, which can show through at the edges of an overlay. If you mostly want to try dresses and skirts, a vest top and shorts or leggings keeps sleeves and trouser legs from showing beneath them.
Light
- Face the light. Stand facing a window, or a little to one side of it, in daylight. Your front should be the brightest part of the picture.
- Never stand with a window behind you. The camera exposes for the bright window and your body falls into shadow, as in the backlit example above.
- Avoid mixed light if you are judging color: a warm lamp on one side and cool daylight on the other tints your skin two ways. Turn off room lights when daylight is enough.
- Soft beats harsh. Direct midday sun makes hard shadows; an overcast day or a sheer curtain gives the even light that product photos are shot in.
Background
A plain wall or a closed door is ideal. Clear away chairs, laundry and anything the same color as the clothes you plan to try, so the edges of your body stay easy to see. The background doesn't have to be white; it just has to be calm.
Camera and distance
Use the rear camera if you can; it is usually sharper than the front one. Distance matters more than people expect: a phone a foot from your face makes the nearest parts of you look bigger. Stand a few steps back from the camera, and if your phone has a 2x lens, use it and step back further. The picture flattens out and your proportions look more like they do in person.
A self-timer setup that works
- Prop the phone upright at about waist height: on a shelf, a stack of books on a chair, or leaning against a bag on a table.
- Step back until your whole body fits the frame with a little room above and below. Mark the spot on the floor.
- Set a 10-second timer, or use burst mode, and take several shots.
- Pick the one where you are standing straightest, with your arms slightly out and your shoulders level.
Keep this photo as your base. Using the same picture for every garment means the light, pose and distance never change, so the only difference between two options is the garment itself.
Mirror selfies
They can work, with care. Stand far enough from the mirror to get your whole body in, hold the phone to the side of your face rather than in front of it, and clean the mirror. The picture is mirrored, so text and asymmetric details come out reversed; flip garments in the tool to match, or flip the photo first.
Privacy
The overlay tool on this site opens your photo inside your browser tab and never uploads it. If you use FitInView's AI try-on, your photos are private to your account and you can delete them. Either way, a plain photo in a t-shirt at home is all you need; there is no reason to use anything more revealing.